So I had this idea, what if I could take an MP3 and turn it into a Vaporwave song. It couldn’t be that difficult could it? All you really need is reverb, pitch-shifting, and a little repetitive sample chopping.
If I was to stick to those three requirements, I’d need the simplest, most accessible tools I knew and had available. Most of you probably don’t know this but I’m a programmer by trade and I’ve written what is known as probably the most extensive book on an introduction FFMPEG, so naturally, we’ll be using that to get the job done.
What tool?
A quick rundown of FFMPEG, it’s a command-line tool for manipulating video, audio, and streaming. Most people use it to convert WAV to MP3 or MOV to MP4, but you can also add video filters, fine-tune audio, and even directly stream to YouTube to it (ok, last time I plug my book). So adding a little reverb and slowing down a track is actually going to be a lot easier than expected.
To get start you are going to need to install FFMPEG. It’s cross platform, so it’ll work on Windows or MacOS, but for this tutorial, I’m going to stick to the terminal on a MacBook Pro. All the code would work the same regardless.
What to expect — an example
Let’s take a track, Diferente, from the 2000s lounge band Gotan Project. I picked this song because the first minute has minimal percussion and the bassline is very rhythmic.
If we pass the first one minute through the script, you’ll get something randomly generated like this:
As you’ll soon find out, the script doesn’t do well with a massive amount of drums because we are randomly slicing the track together. So a snare hit might be right next to another snare and we’ll get a glitchy sound. If this post somehow gets 500 views, I’ll figure out a way to make the script beat aware.
The Code
FFMPEG runs through a terminal like this:
to make your song we will need to run X commands to get the final product. Don’t worry, I’ll give you plenty of explanation along the way. For the purpose of this tutorial, the original sample track will be called Diferente.mp3. It is also presumed you installed FFMPEG correctly.
Splicing the sample
I know my track is 60 seconds long. I want to splice it into 6 different parts, at 10 seconds each. To do this we’ll run this command at the folder the Diferente.mp3 is located.
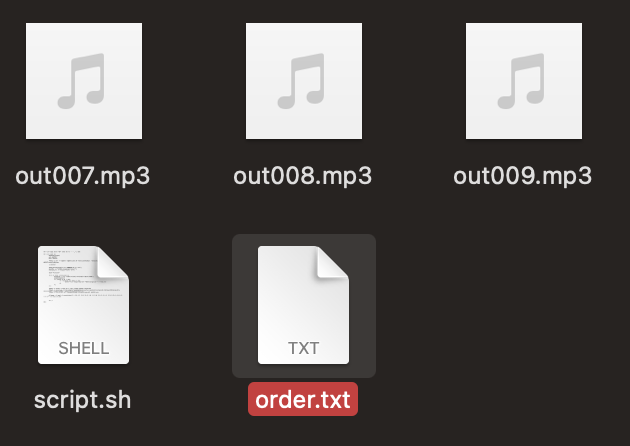
ffmpeg -i Diferente.mp3 -f segment -segment_time 10 -c copy out%03d.mp3Here 6, 10 second mp3 will be generated in the same folder as the mp3. If you look at your folder, you’ll see a bunch of outnumbers.mp3, like this:

Arranging the track
Here’s the fun part, creating the order in which your spliced samples will be put back together. This one is a little less scripty and requires a little effort.
First in the same folder add a file called order.txt:
Open the order.txt file and paste in any order of the outnumbers.mp3, this will be the order the tracks are fused back together into a single mp3 again. Here’s what mine looked like:
file 'out000.mp3'
file 'out001.mp3'
file 'out002.mp3'
file 'out003.mp3'
file 'out001.mp3'
file 'out002.mp3'
file 'out004.mp3'
file 'out001.mp3'
file 'out002.mp3'
file 'out003.mp3'
file 'out002.mp3'
file 'out002.mp3'
file 'out003.mp3'
file 'out001.mp3'
file 'out003.mp3'
file 'out005.mp3'
If you notice, there are 16 different lines. Meaning when the track will together, it’ll be ~160 seconds long.
Putting the track back together
The script might be a little complicated but using ffmpeg’s concat, it takes the info inside order.txt and creates a new track called new-diferente.mp3
ffmpeg -f concat -i order.txt -c copy -fflags +genpts new-Diferente.mp3If you play your new track, you’ll see you turned a 60 second track into a 2 minutes and 32 second one programmatically! Well done.
Adding reverb & pitch shifting
Here’s the magic script, really you could apply this to any mp3 but with the use of the apad, aecho, adelay, and asetrate filters, you can really mess around with the audio. I won’t go into each one, but I linked the documentation above.
The main one you might be interested in is asetrate, set this number below 44000 and it’ll slow down the track in various ways.
ffmpeg -i new-Diferente.mp3 -filter_complex "apad=pad_dur=2,aecho=in_gain=0.2:out_gain=0.2:delays=150:decays=0.5, asetrate=35000, lowpass=f=6000" -preset ultrafast effects-Diferente.mp3Because we used asetrate to change the sample_rate, you won’t be able to upload your mp3 to most platforms. To fix this, run this quick fix:
ffmpeg -i effects-Diferente.mp3 -af "aresample=44100" final.mp3Final track
There you have it. You programmatically generated some vaporwave. Let’s hear the difference: